
Email Templates
Email Templates allow you to create reusable email messages in Tinsel. You can create templates for different email types, such as proposals, invoices and payments.
This guide walks through how to open Email Templates, create a new template, understand each template field, edit existing templates, and manage templates from the Email Template table.
Opening Email Templates
To get to Email Templates:
- Go to Settings.
- Select Emails tab at the top.
- Navigate to Email Templates.
Settings > Emails Tab > Email Templates
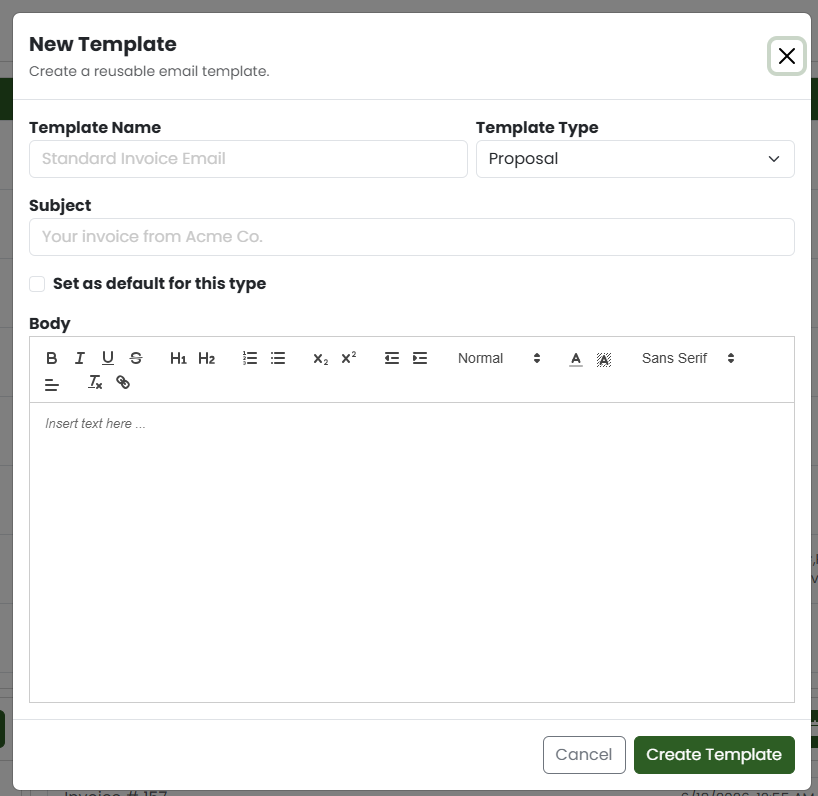
Creating a New Email Template
- Click “New”
- Enter the template name.
- Select the template type.
- Enter the email subject.
- Enter the email body.
- If this should be the default template for the selected type, check “set as Default for this type”.
- Click “Create template”.
The new template will be added to the email template list.
Template Fields
When creating or editing a template, you may see the following fields:
- Name
- Type
- Subject
- Body
- Default
Name
The name is used to identify the template in Tinsel.
Choose a name that clearly describes when the template should be used.
Type
The type determines where the template will be available.
Subject
The subject is the email subject line that will be used when the template is selected.
You can still update the subject before sending the email.
Body
The body is the main content of the email.
This is the message that will be inserted when the template is selected.
Anything with “##” is a placeholder that Tinsel automatically recognizes and replaces with the proper data. You can leave these in the templates and Tinsel will replace them automatically. Here is a list of placeholders currently available:
- ##FIRST_NAME## ← This will be replaced with the first name of the primary contact.
- ##AMOUNT_PAID## ← This will be replaced with the amount already paid on the proposal at the time the email is sent.
- ##INVOICE_BALANCE## ← This will be replaced with the balance of the invoice at the time the email is sent. (not to be confused with the proposal balance)
- ##PROPOSAL_BALANCE## ← This will be replaced with the balance of the total proposal at the time the email is sent. (not to be confused with invoice balance)
Example:
Hi ##FIRST_NAME##,
Thank you for your payment. We have received ##AMOUNT_PAID##.
Your remaining invoice balance is ##INVOICE_BALANCE##.
Default Template
If a template is marked as default, it may be automatically selected for that email type.
Only one default template may be available per type, depending on your system settings.
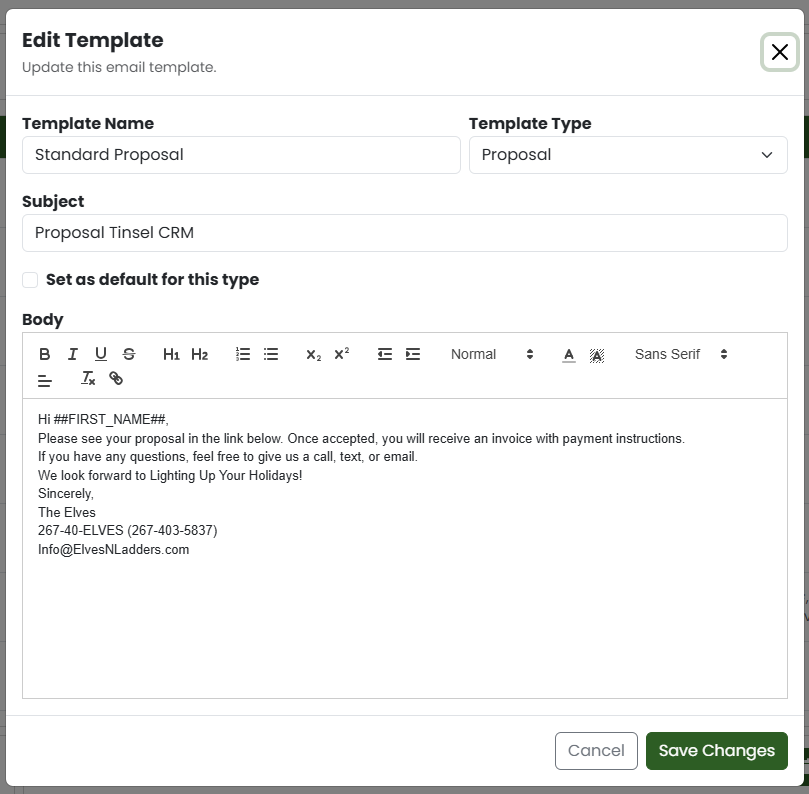
Editing an Email Template
- Find the template you want to update.
- Click edit icon.
- Update the name, subject, or body.
- Click “Save Changes”.
*Template type would be disabled if it is in default
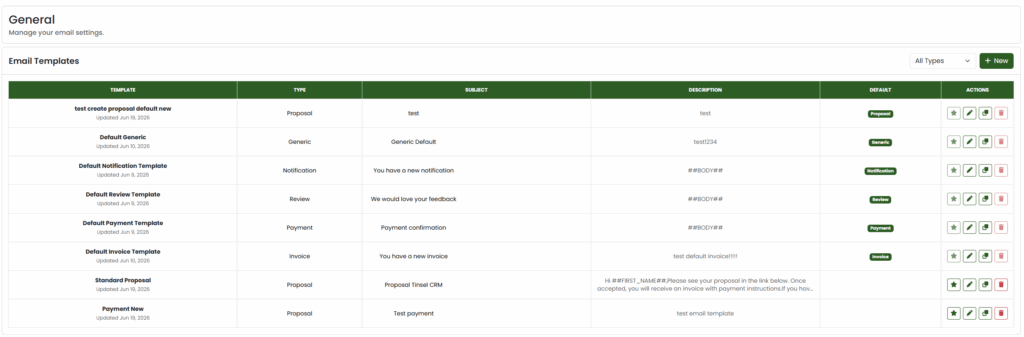
Using the Email Template Table
The Email Template Table appears on the Email Tab of the Settings page.
This table displays all email templates that have been created. You can use this table to review templates, filter templates by type, create new templates, edit existing templates, duplicate templates, set default templates, and delete templates.
Each row in the table represents one email template.
Template Column
The Template column shows the name of the email template.
Below the template name, you will also see when the template was last updated.
Use this column to quickly identify the template you want to review or edit.
Type Column
The Type column shows what kind of email the template is used for.
This column appears when the filter is set to “All Types”.
Use this column to confirm that the template belongs to the correct email category.
Selecting the correct type is important because Tinsel uses the type to filter which templates are shown when sending a specific kind of email. For example, if you are sending an invoice email, Tinsel will only show templates that match the invoice email type.
Subject Column
The Subject column shows the email subject line that will be used when the template is selected.
You can review this column to confirm the subject before editing or using the template.
Description Column
The Description column shows a preview of the email body.
This preview helps you quickly identify the contents of the template without opening it.
Default Column
The Default column shows whether a template is the default template for its type.
If a template is marked as default, a badge will appear in this column showing exactly which Type it is the default template for.
Default templates will be automatically selected when sending certain types of emails
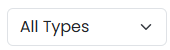
Filtering Email Templates by Type
- Go to the Email Templates page.
- At the top-right of the table, find the template type dropdown.
- Select the template type you want to view.
- To view all templates again, select “All Types”.
When “All Types” is selected, the table will also show the Type column so you can see which type each template belongs to.
Using the Action Buttons
The Actions column contains buttons for managing each template.
Available actions include:
- Set as Default
- Edit
- Duplicate
- Delete
Setting a Template as Default
- Find the template you want to make the default.
- Click the star button in the Actions column.
The selected template will become the default template for its type.
If the template is already the default, the button is disabled.

Editing a Template
- Find the template you want to update.
- Click the edit button in the Actions column.
- Update the template details.
- Click “Save Changes”.
The updated template will now be available the next time you send an email.

Duplicating a Template
- Find the template you want to copy.
- Click the duplicate button in the Actions column.
- A copy of the template will be created.
- Edit the duplicated template if needed.
Duplicating a template is useful when you want to create a similar message without starting from scratch.

Deleting a Template
- Find the template you want to remove.
- Click the delete button in the Actions column.
- Confirm the deletion when prompted.
Default templates cannot be deleted until another template is set as the default.
If the delete button is disabled, the template may currently be marked as the default.

0 Comments